Step 1: Navigate to the Dashboard

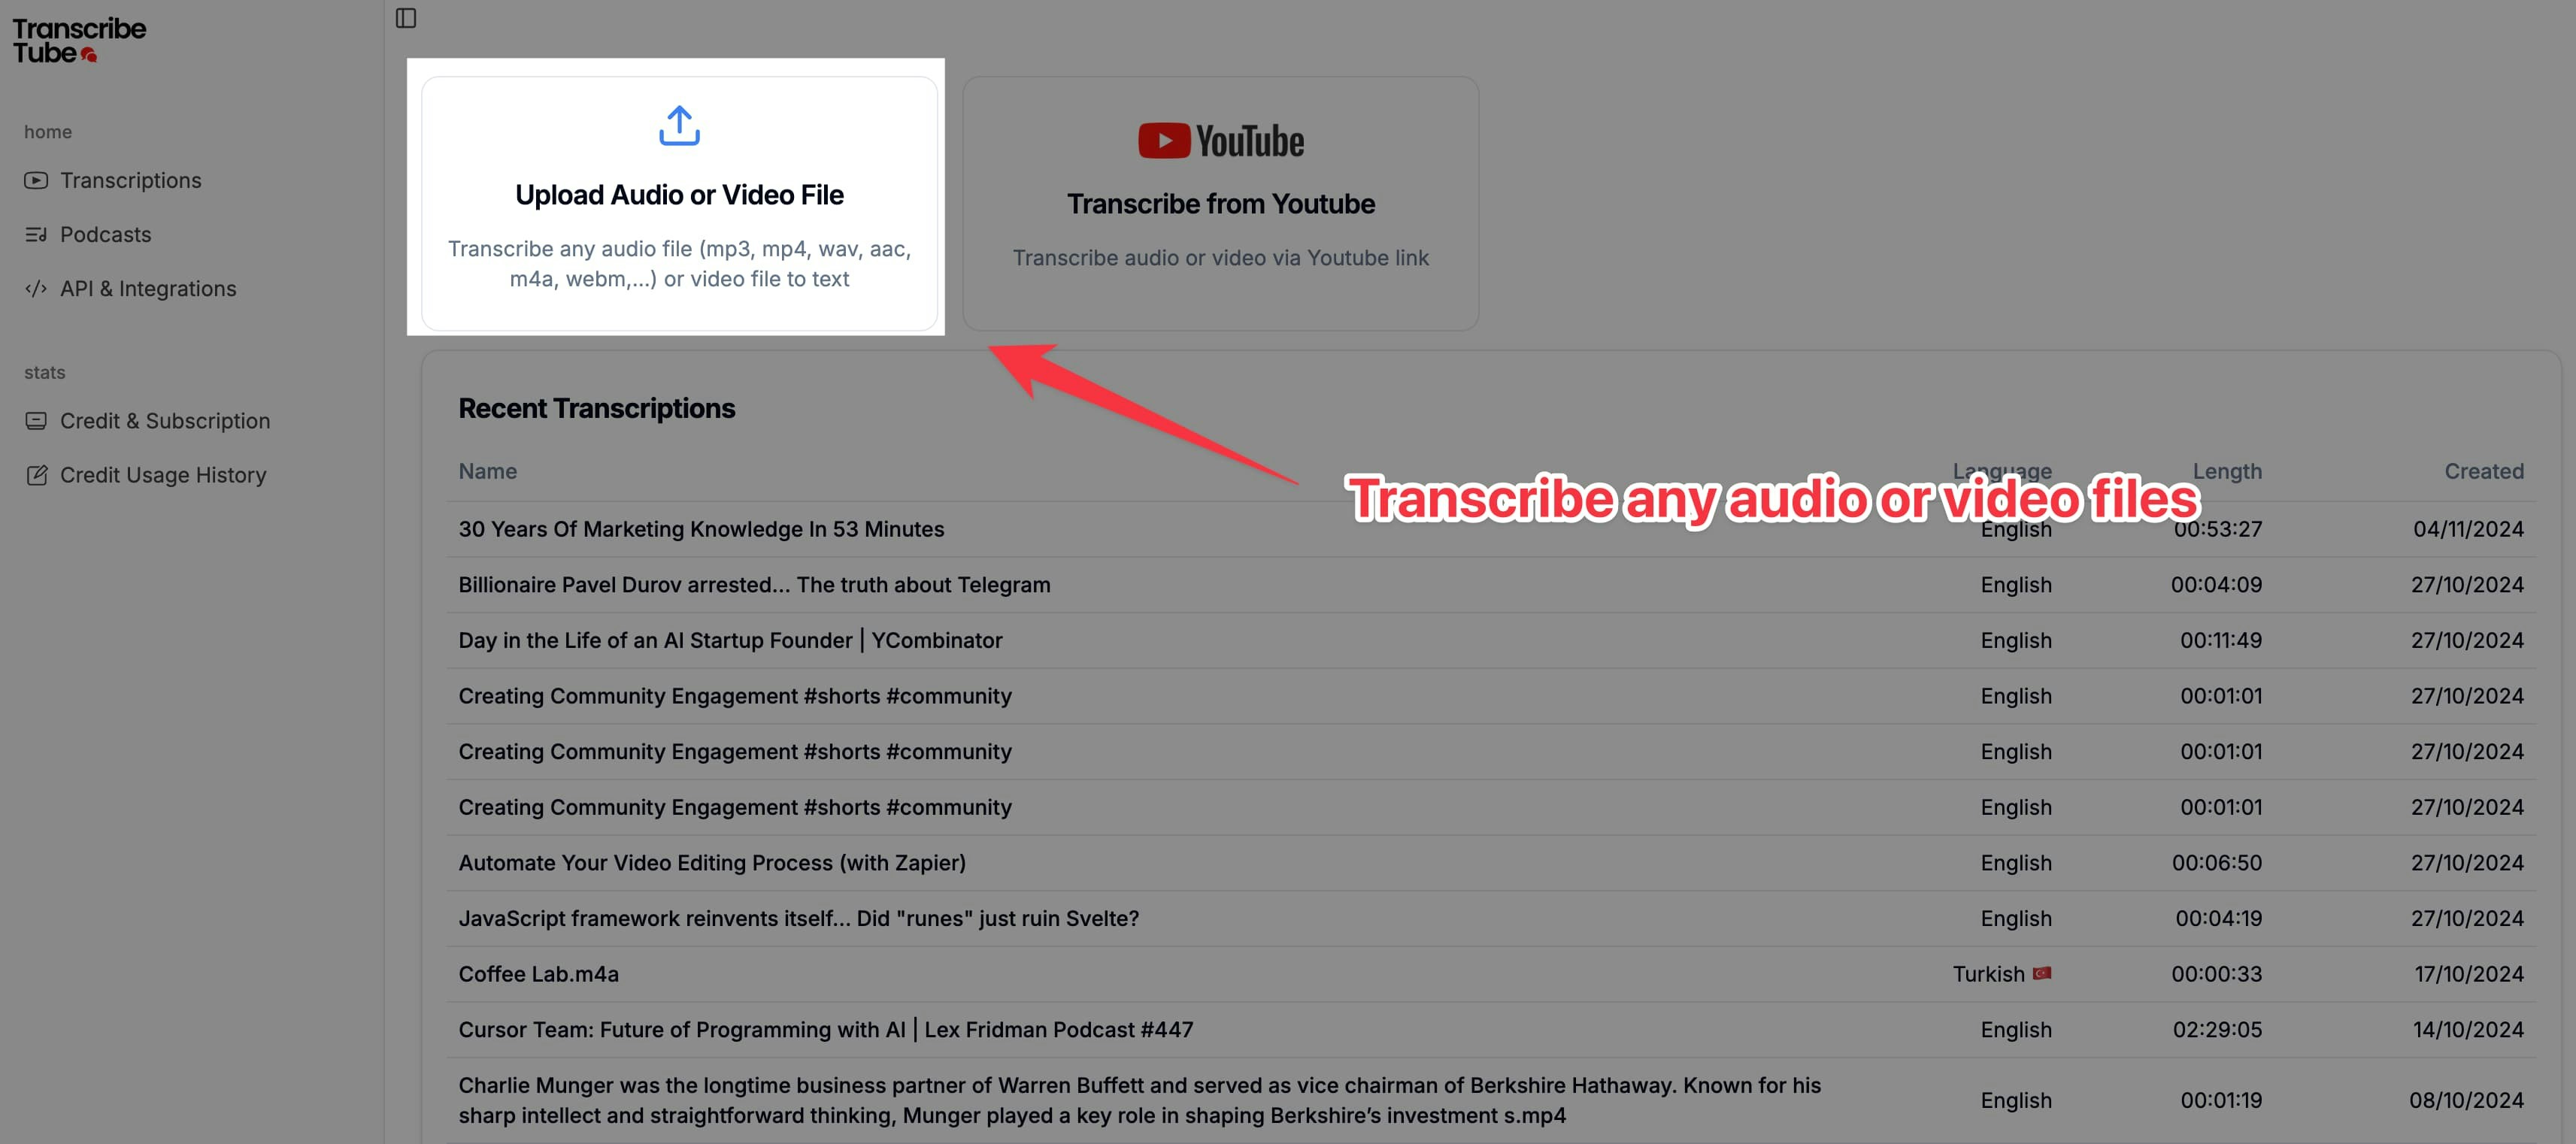
- Go to the TranscribeTube Dashboard.
- You’ll see options to upload your audio or video file directly or transcribe from a YouTube link.
- Click on the “Upload Audio or Video” button to start the process.
Step 2: Upload Your File

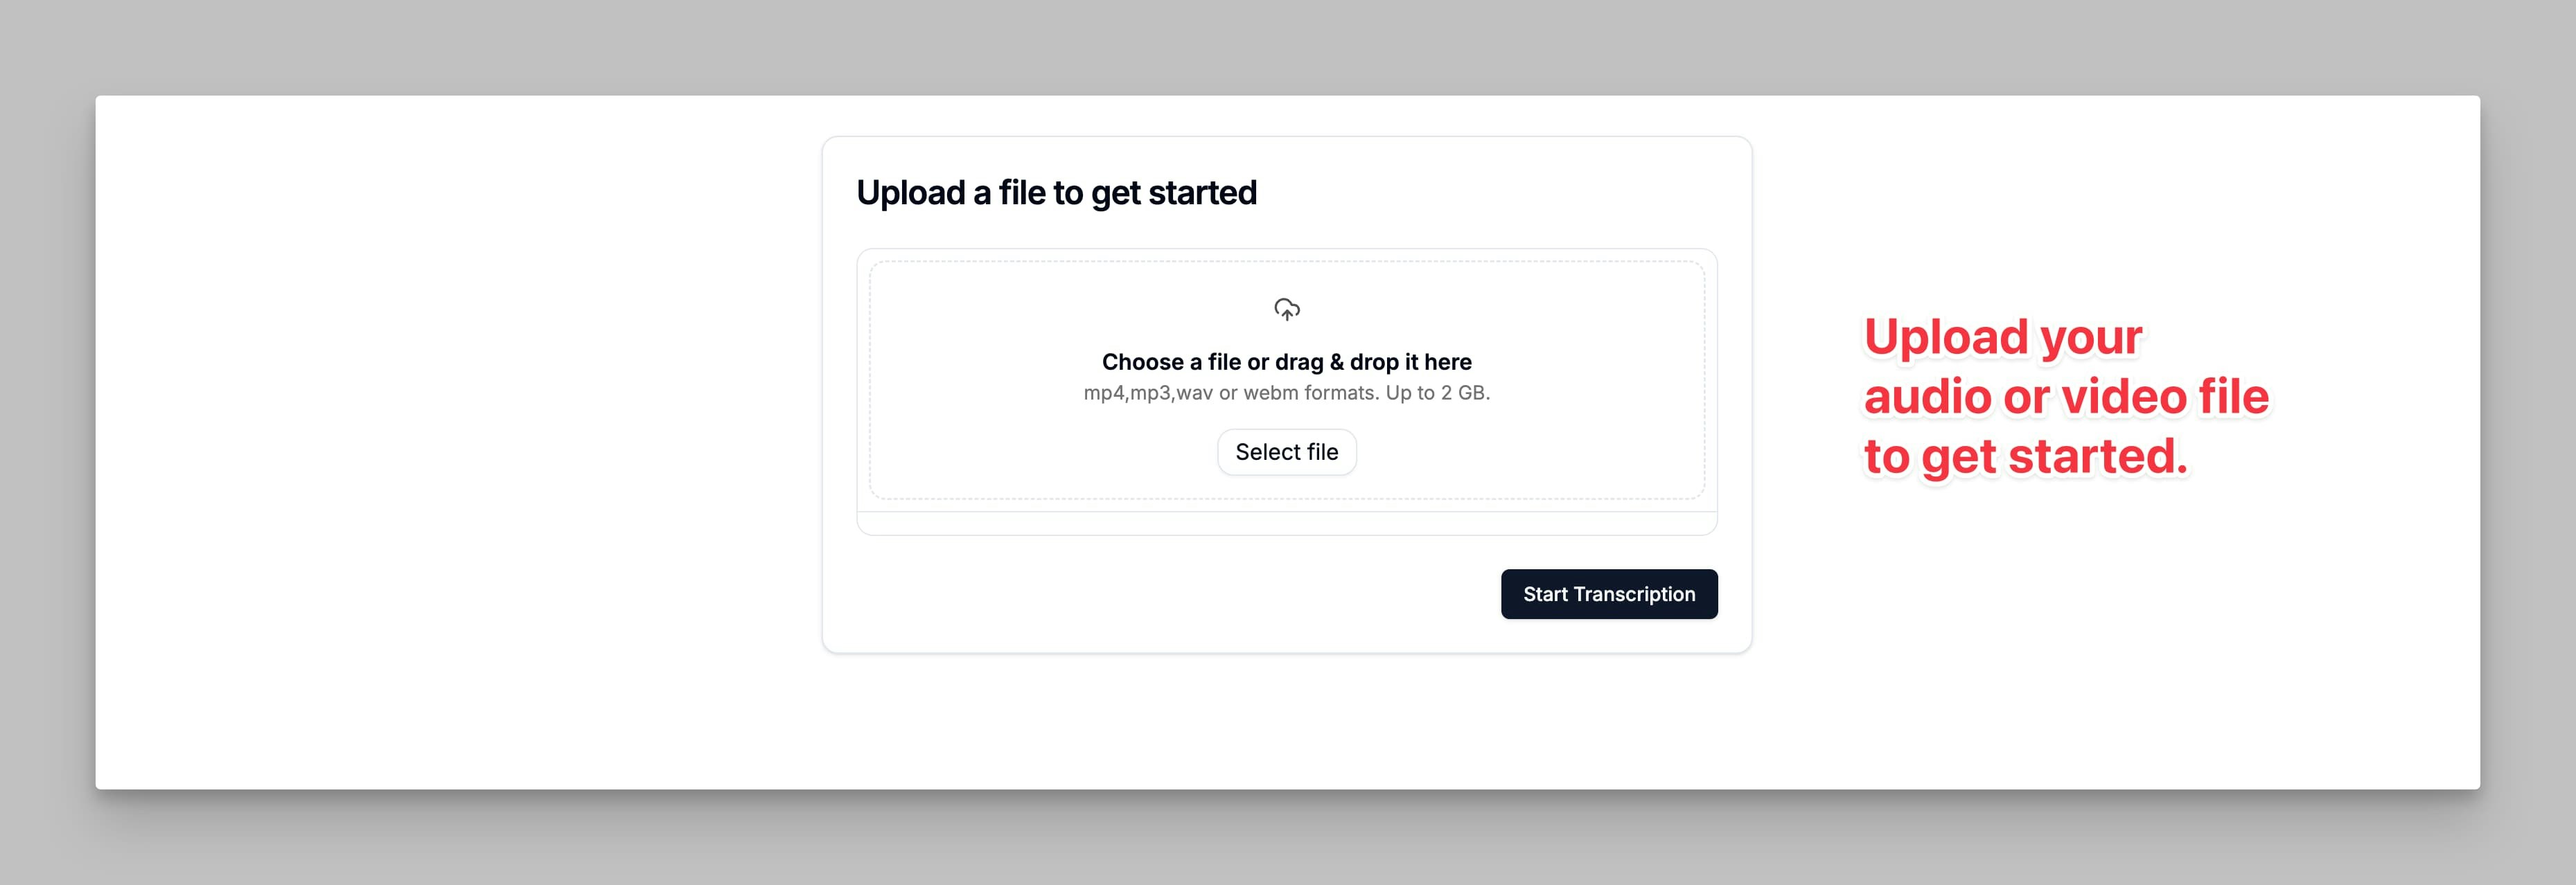
- On the upload screen, select the audio or video file you wish to transcribe. Supported formats include
mp3,mp4,wav,aac,m4a, andwebm. - Drag and drop the file into the upload area or click on “Select File” to browse from your device.
- Once the file is selected, click on “Start Transcription” to initiate the process.
- TranscribeTube supports files up to 2 GB in size.
Step 3: Edit Your Transcription

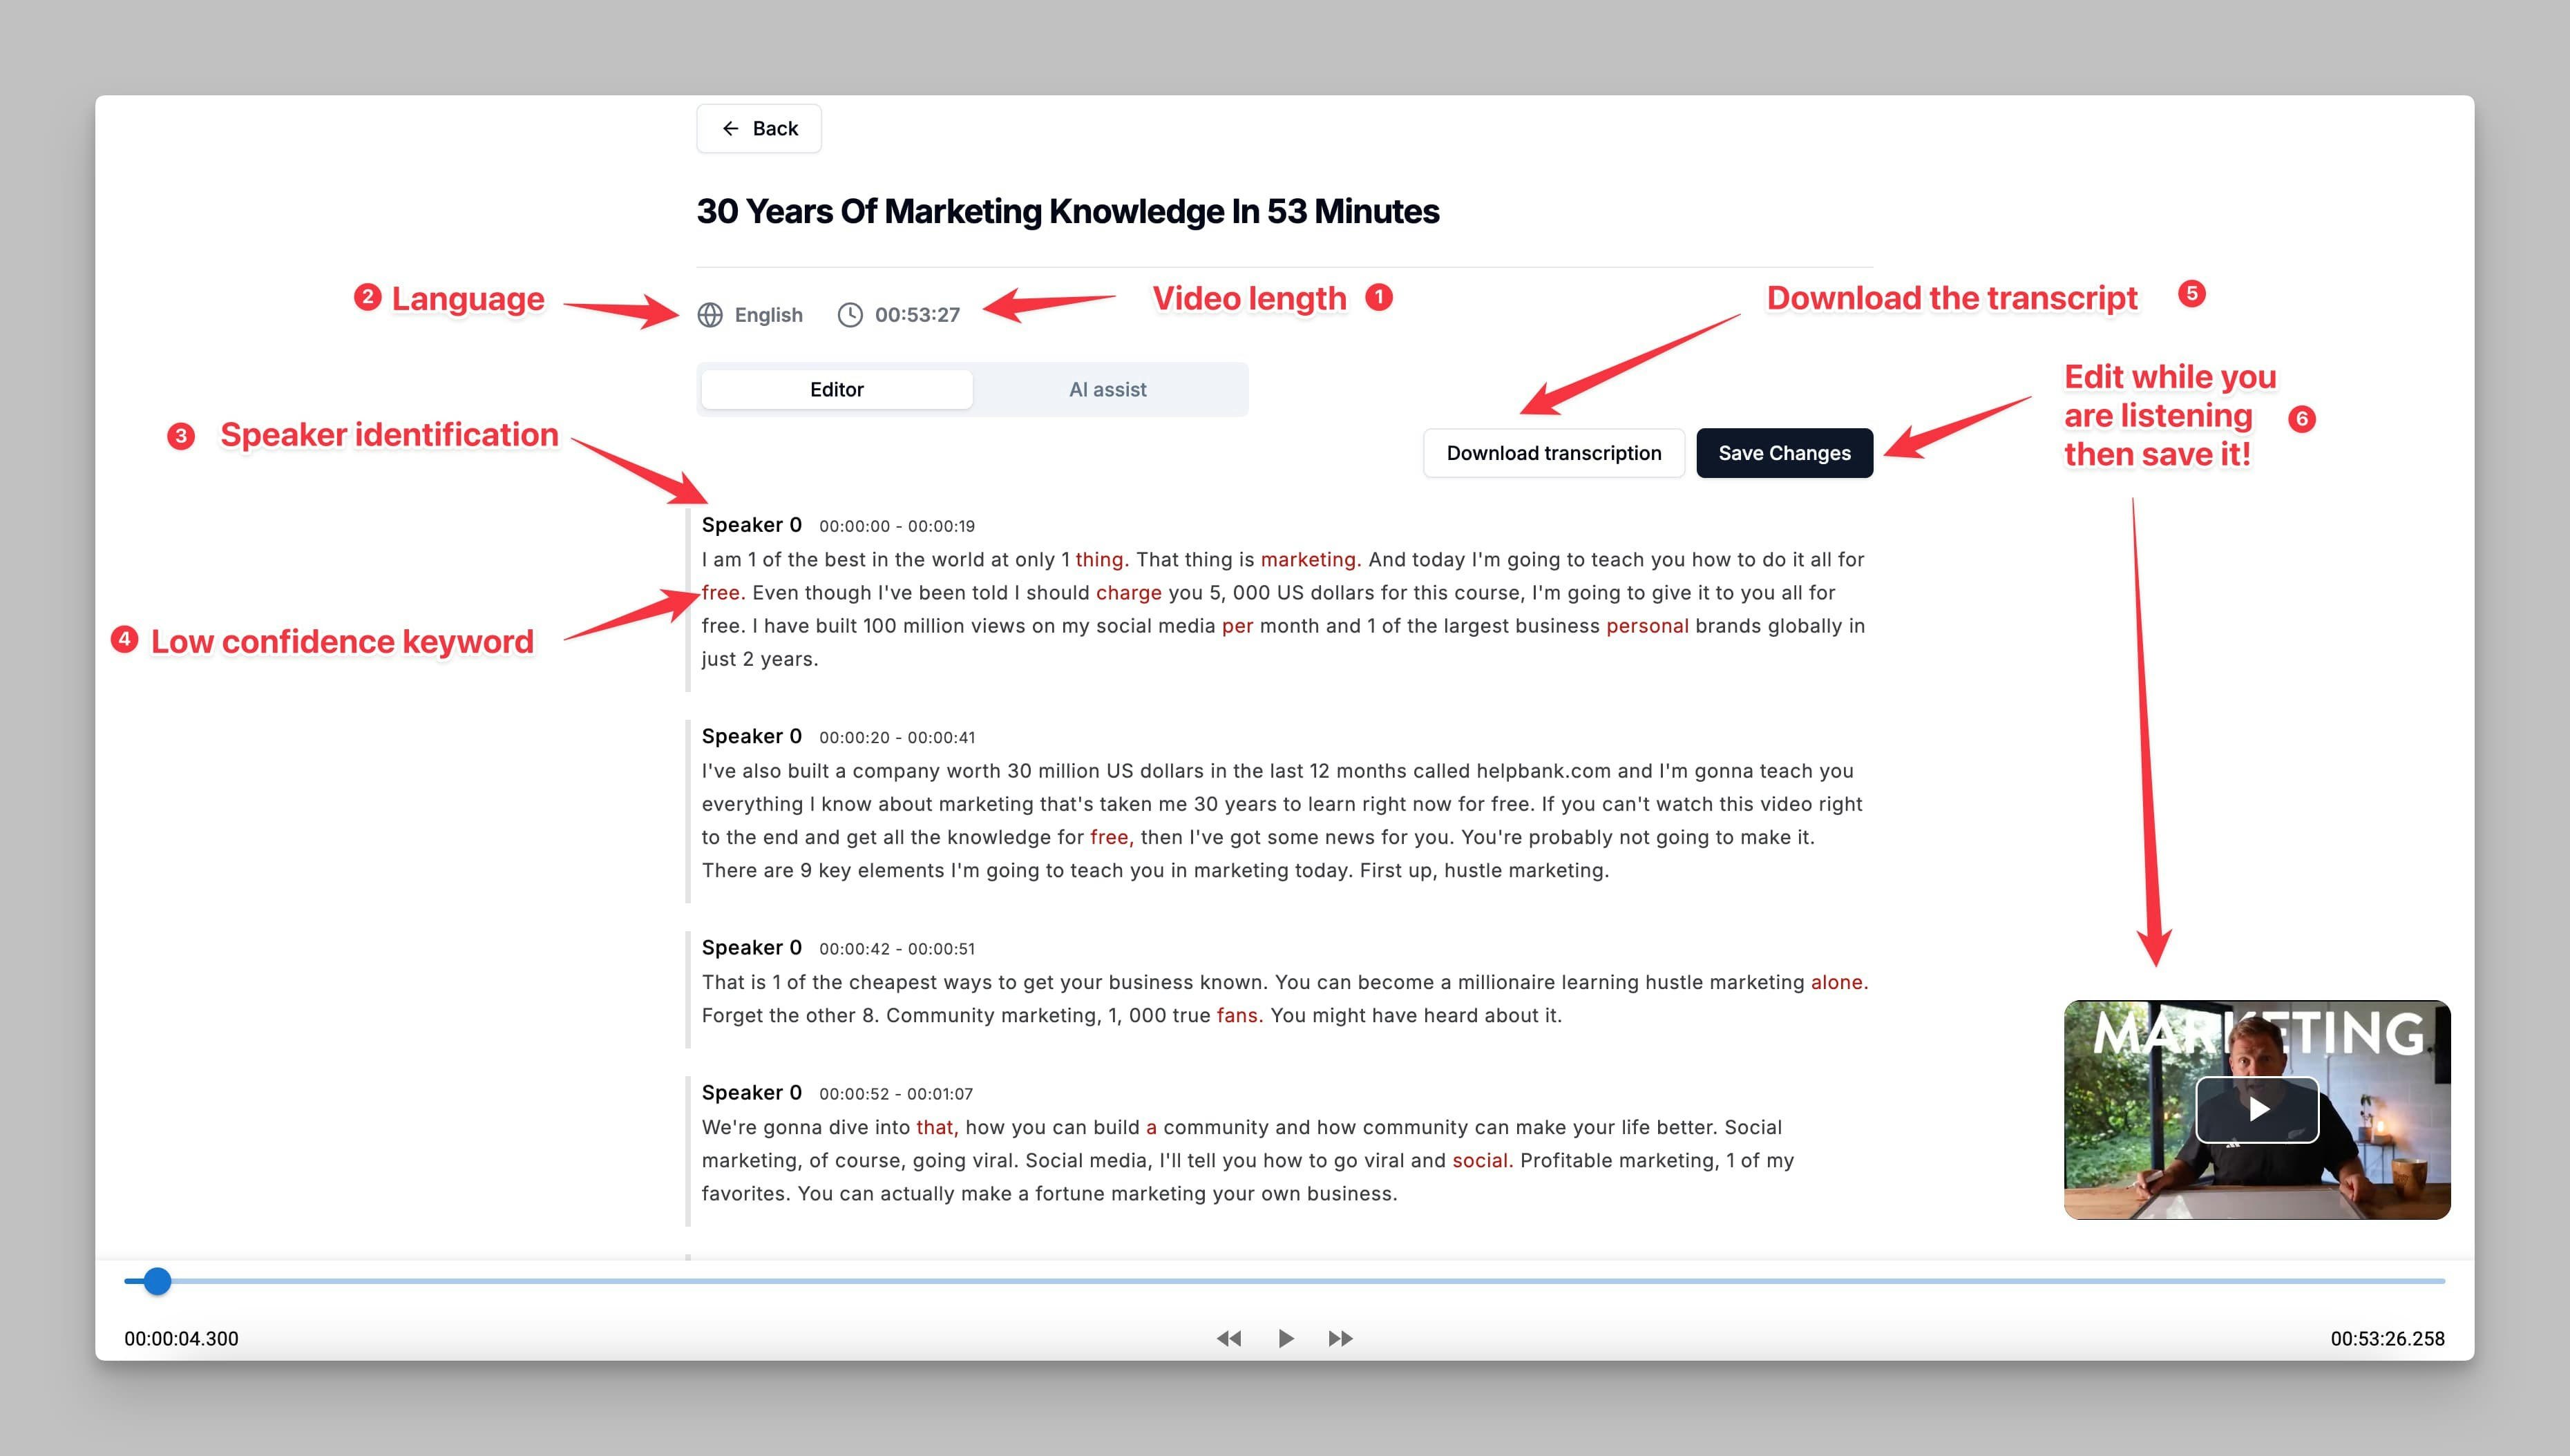
- Once the transcription is complete, it will open in the transcription editor.
- You can see details like the language, video length, and speaker identification.
- Low-confidence words will be highlighted, allowing you to review and correct any parts of the transcription that might need adjustments.
- You can edit the transcript while listening to the audio to ensure accuracy, then click “Save Changes” once you’re done.
Step 4: Download Your Transcription

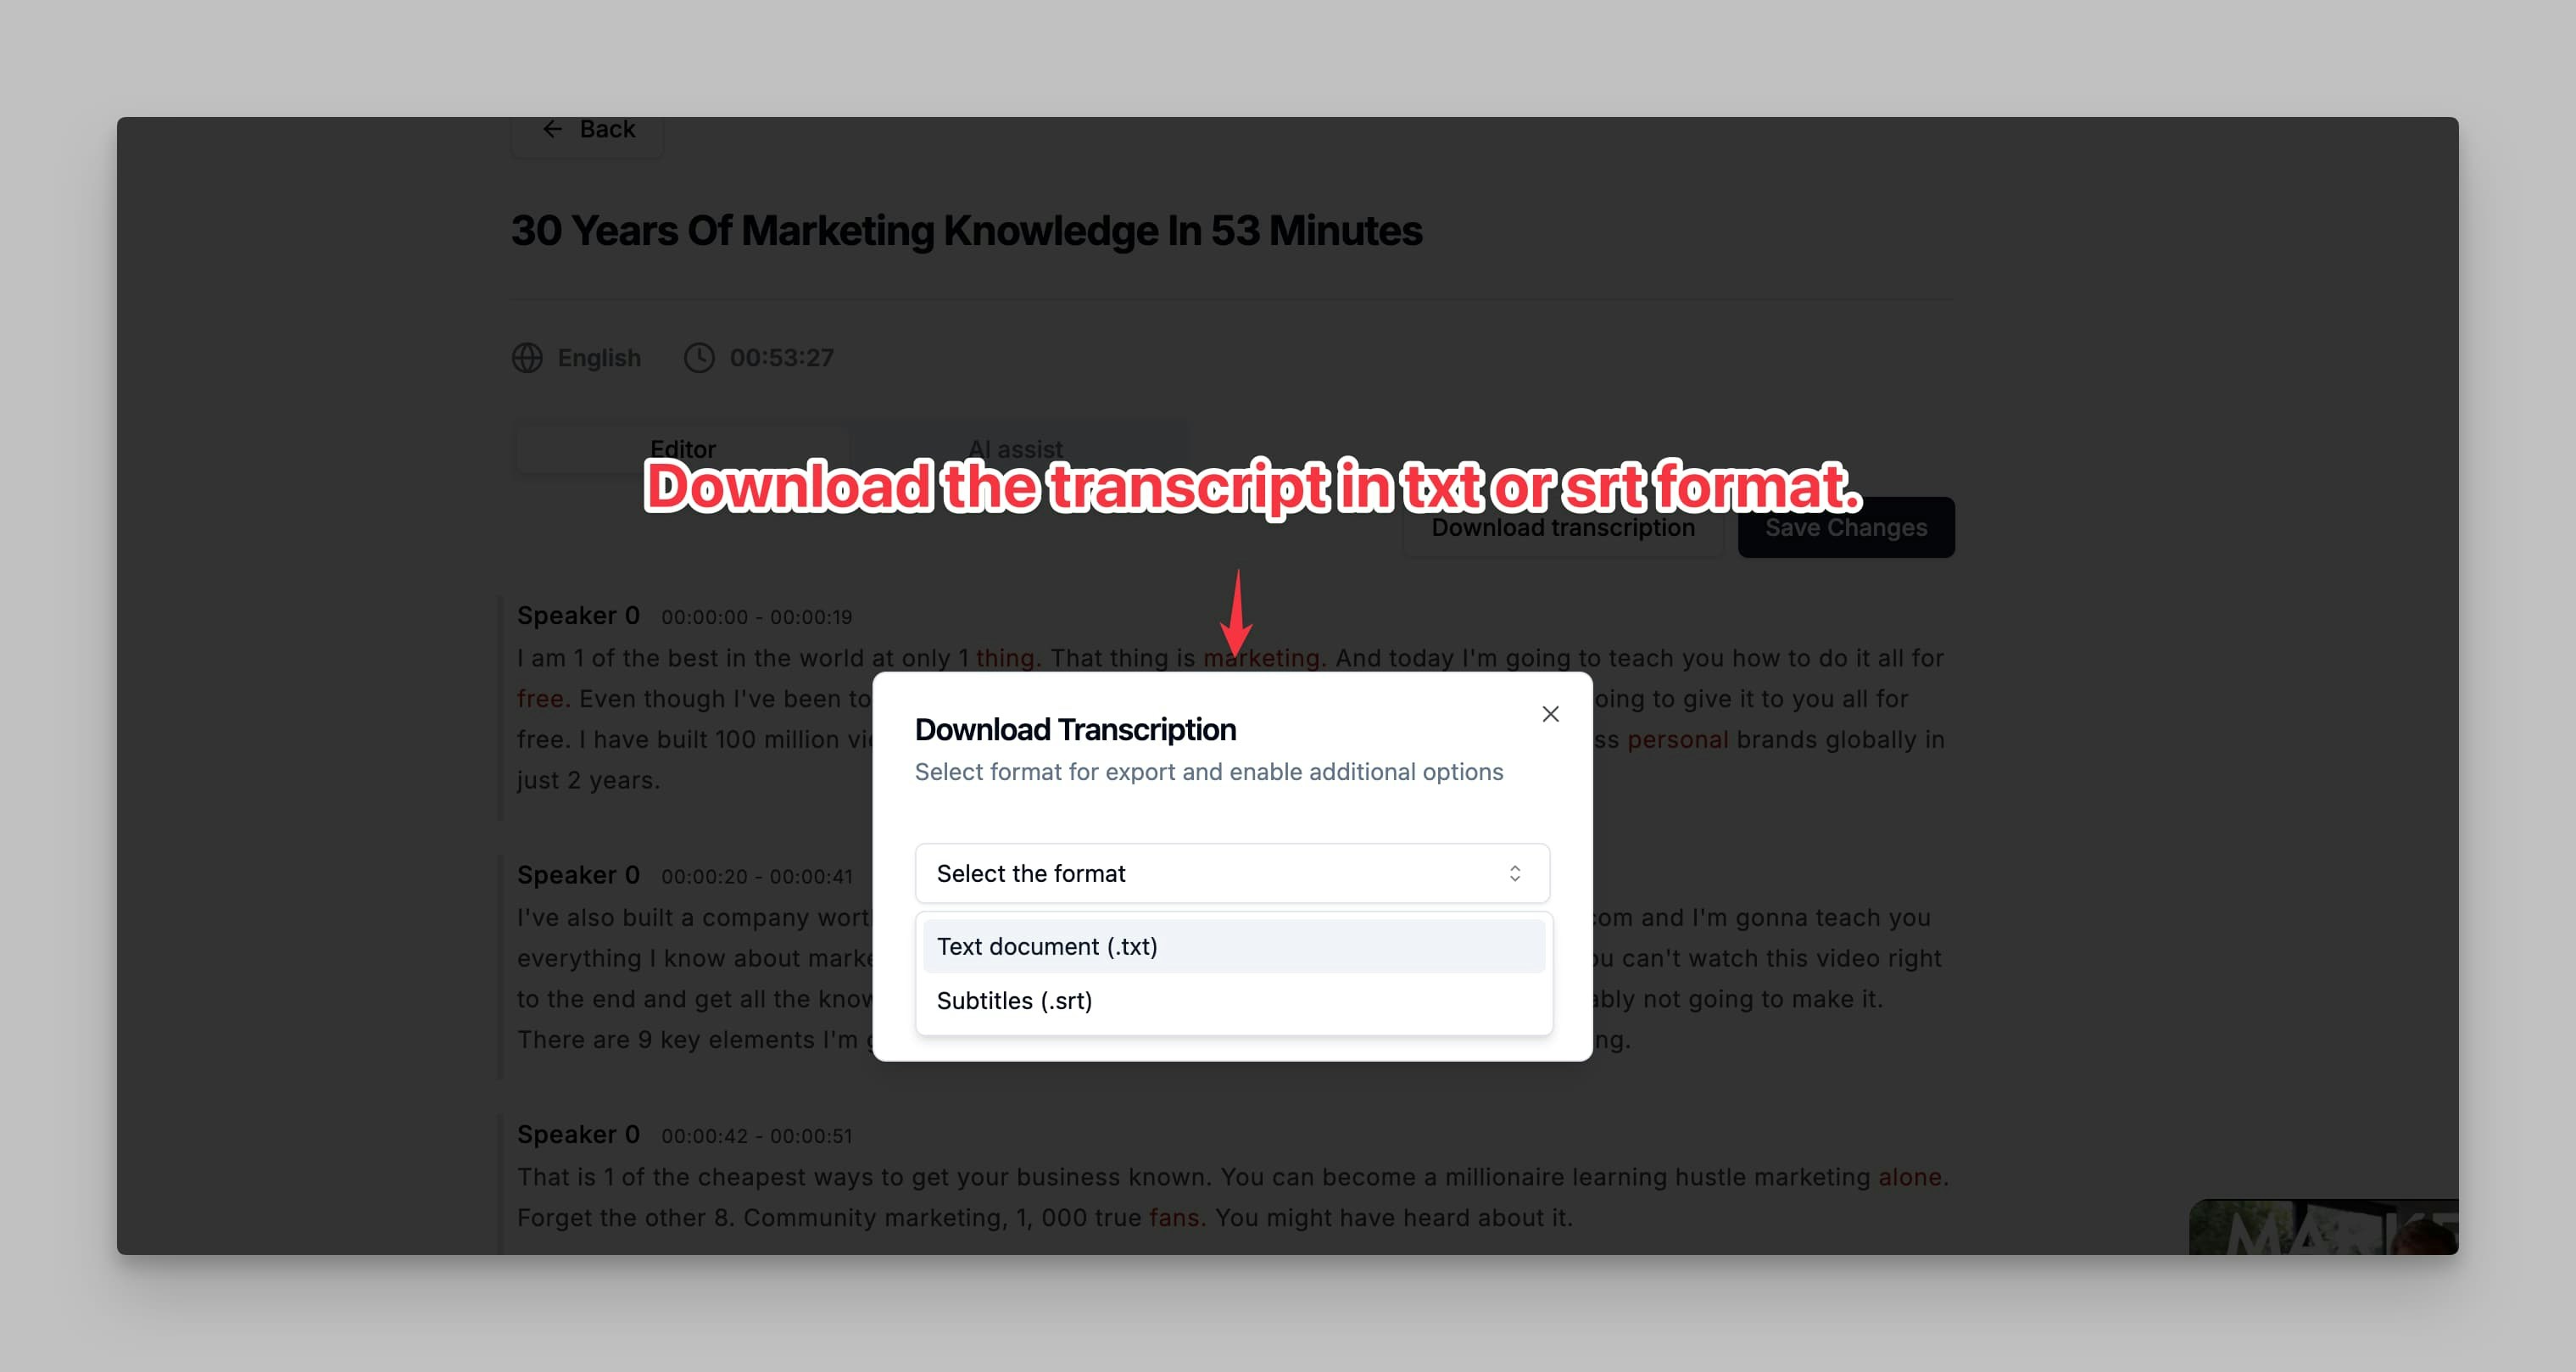
- After editing, you can download the transcription in your preferred format.
- Click “Download Transcription”, and choose between
.txt(text document) or.srt(subtitle) formats. - This makes it easy to use the transcription for various purposes, such as creating captions or storing notes.

